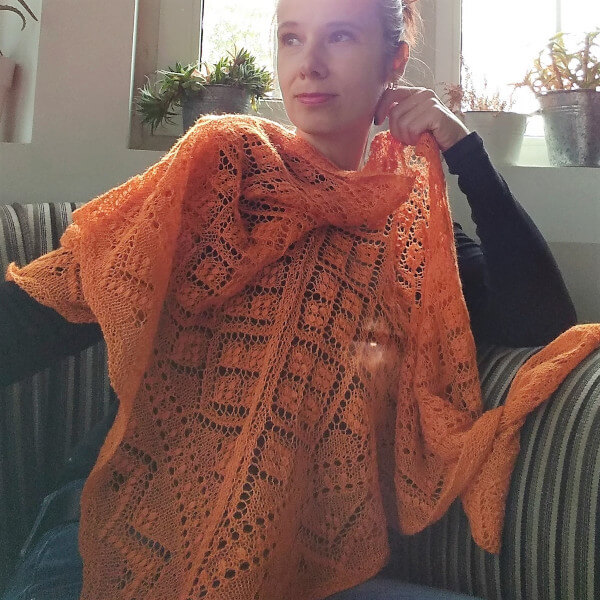
It was already a long time ago I promised to write a pattern to the orange coloured lacy scarf.
Now it is finally finished.
The scarf is knitted from top to bottom, increased from edges and center.
This is my style because I really don`t like casting on stitches.
For this scarf you have to cast on only 4-6 stitches depending how wide you`d like the edge of the scarf be.


Materials and tools I used:
70g lace thin wool yarn for example Haapsalu shawl yarn. For this scarf I took the yarn two-folded.
I suggest bamboo knitting pins no 3 or 3,5 (depending on the knitter`s “handwriting”)
I am used to use only circular pins, so this time I chose 60cm long pins. But actually one can use whatever kind of pins. Just how it is more comfortable.
I also like to crochet the last row, hence one crochet hook no 3 or 3,5 is also needed.

Beginning
Cast on 5 s. Knit forth and back 6 rows.
On the 7th row knit the 5 s then turn to the side and pick up 3 stitches from the side and then turn and pick up 5 stitches from the beginning row ow the piece.
You have now 13 stitches on the pins. 5 for edge, 3 for the main part and 5 for the other edge.
On the back (8th) row knit first 5 s, then purl 3 s and knit last 5 s.
Check the blueprint on the side or you can watch my video on the YouTube channel.
(the video is in estonian, but I hope the technique is understandable also without the explanation)

Next start knitting by the diagram.
The 5 and 5 edge stitches are always garter stitch.
Back rows i.e. the rows with even row number always purl (except the 5+5 edge stitches as mentioned before)
The diagram shows you half of the triangle. The other half knit exactly the same way.
After every forth and back row the scarf increases 4 stitches.
Between the lines on the diagram is one pattern repeat.
You can also count the pattern repeats by the bigger formed rhombs.
The scarf has 6 rhomb repeats before the edge pattern.
The numbers between the arrows show the number of the rows (and number of stitches between the center stitch and edge stitches)


Pay attention to the rows from 127 to 142. The diagram shows here also back rows.
It means that you have to knit some back rows (instead of purl, like all other back rows)
The diagram shows you the view from the front. That means if the diagram shows you purl symbol on the back row (that is the row that has even row number) you have to knit it.
Befinning from the row 143 purl all back rows again.
Last 6 rows knit forth and back i.e. garter stitch.
So you will have a edge that doesn´t start to furl up.

I would suggest to bind off stitches with flexible stitches. That means that before each bind off take one yarn over.
The other option is bind off with crochet hook. That means that I take each stitch one by one to crochet hook and bind off by single crochet stitches. This way the edge is more stretchy than it is after usual bind off.
I wouldn`t suggest the usual bind off as it might leave the edge too tearing. Maybe in case of the straight edge scarf it isn`t such a big deal but still I wouldn`t suggest to try 🙂
Better prevent it.


Finish the scarf by wet-stretching it. Try to form it as correctly as possible to perfect, straight edged triangle and fasten it to the surface.
I use headpins for fastening and my large bed or carpet for the surface.
I stretch the wet scarf on the bed and fasten it with headpins.
It would be ideal to leave it dry for at least 24h. I don´t usually have enough patience. Those thin scarves-shawls usually dry within few hours. But to achieve the better form you should let it stretch for a while even after it is already dry.
Try the same pattern with some other yarn!
For example if you use one fold fine lace wool yarn you´ll get very lacy gentle garnment. Then again using some thicker wool yarn you´ll get warm and cozy, useful winter accessory.
Knitting is the best therapy!
Enjoy the pins` gymnastics!
